Thinking about taking your event online but have no idea where to start? Getting bombarded with concepts like ‘webinar’ and ‘web conferencing’?
With many events adapting and transferring to the virtual world, it may seem daunting trying to keep up. But hosting an event online can be simple and is a great way to engage your customers in a brand new, exciting way (all from the comfort of their home)!
But where do you start? We’ve created 6 easy steps to assist you in not only ticketing your event, but also adapting your event to an online platform from start to finish!
- Choose a web hosting platform
- Sell your tickets (Ticketebo can help you here!)
- Market & advertise
- Create your event day set up
- Host your event
- Post-event feedback
1. Choosing an online platform
The first place to start is to find an online web conferencing platform to host your event.
There are several sites that offer similar products so doing some research to find one that best suits your event is important. Most will offer a video streaming service, with chat features, screen sharing and presentation options. If it suits your event, creating and sharing a presentation through these platforms is something tangible for your attendees.
Some great sites include: ClickMeeting, Demio, Zoom, GoToMeeting.
There is also the option with some providers (ClickMeeting is one of them) to deliver a unique password to each of your attendees – this means that only paid attendees can access your event!
Depending on the type of event, you may want different levels of attendee participation, and therefore different audio and visual capabilities. You may only need your attendees to listen, or perhaps you want to allow a Q&A session at the end with both microphone and video in use. When researching your web conferencing platform, make sure you look into how many attendees per session are permitted, how long sessions can be and audio/visual allowances for your attendees.
We have tested some of these platforms for our own video meetings so if you would like to hear more about our experiences, please feel free to contact us.
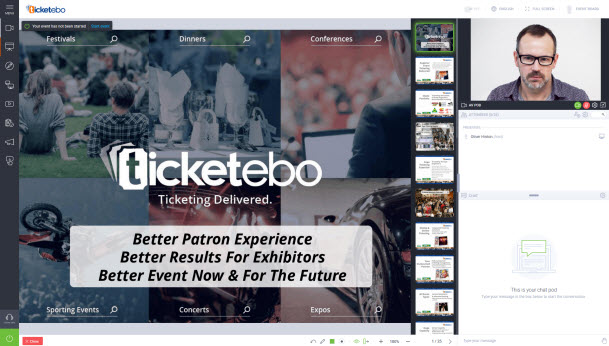
2. Selling tickets to your virtual event
You want to ensure that you use an advanced ticketing platform that can cater for your virtual event. This is where we can help. We offer pain-free online ticketing which is free to the organiser, simple to use and stunning in design.
We’ve set up a sample online event so you can see some of the features we can offer you for your ticketing page. Take a look here.
With features such as multiple session times on one page, unique URLs and the ability to ask custom questions, we can work with you to create a page that suits your event perfectly. On completion of booking, your patrons will receive their order confirmation and PDF receipt/invoice via email.
To get started with setting up your ticketing page, please register here and one of our friendly team members will be in touch to guide you through the process.
3. Marketing & Advertising
With the current global COVID-19 pandemic, many people may assume the events they were interested in have been cancelled for the foreseeable future. It also means that many people are looking for new ways to fill their time.
Your target audience is now wider than ever before because you are no longer restricted to those in your geographic location.
Spend some time advertising your event on social media to create interest and ensure your first online event has a great turnout! Both Facebook and Instagram have excellent promotion features that allow you to target a broad range of customers.
If you have an active LinkedIn account you can reach out and network with other like-minded members of the community and expand your business network, inviting them to your online event.
Don’t forget to email your current database of customers to invite them as well!
4. Creating your Event Day set up
An imperative part of running an online event is ensuring that your set-up to host is perfect.
There are a few key aspects to cover here:
Location – Where are you going to set up?
What you have as your background will say a lot to your viewers. Try to find a nice quiet room with plenty of space to set up your equipment. It doesn’t have to be a plain white wall; in fact depending on your event you may want to add some furniture or plants in the background to make it homely.
It is important you test your space for sound and light before your event starts. Think about the time of day, where the light enters the room and whether your neighbour may embark on some loud DIY projects right next to your window!
Equipment – What do you need to film this event?
You don’t need to have the most up-to-date camera and equipment to run an online event. Whilst you can purchase the latest microphone, camera and sound devices, you can also make do with the equipment you already have!
A successful online event can be run with the following items:
- A computer/laptop with filming capacity (an in-built webcam)
- Headphones with in-built microphone if your location isn’t quiet enough to use the in-built microphone on your computer. Headphones that connect via Bluetooth allow you to stand further back if you need room to present products.
- A tripod
- Internet Access
A few top tips:
- Try to place the camera at eye-line; if you don’t have a tripod to do this, get creative! Maybe try stacking some books on top of a table to achieve the height you need.
- Keep light on your face, not behind you, as light behind you will create a dark image for your attendees to see.
5. Hosting your event
The big day has arrived; you’ve spent weeks planning your content, preparing your presentations and setting up your space and now it’s almost time to host the event. Don’t be afraid to do a test recording before you go live to ensure the audio and visual aspects are clear for your attendees – you may even want to practice your delivery so you feel comfortable when you’re live on camera. Some of the web conferencing platforms have this feature built in but if not, simply hit record on your camera and watch yourself back. You’ll be able to get a feel for what your event will be like when it’s live!
A few top tips:
- Pre-load any presentations, videos or audio needed before the event
- Ensure you have access to power and keep your equipment plugged in. You don’t want your devices to lose power half way through your event!
6. Post-event feedback
Congratulations, you’ve just finished your first online event! We hope it was a huge success! You now have a feel for what works for you and what you might change for next time.
But the work isn’t done just yet.
Depending on your event, you may want to email a copy of the presentation to all your participants or send a recording of the event. Ticketebo provides sales reports with email addresses of participants so you can contact them after the event; to send out a survey, to receive feedback or so you can invite them to your next invite!
So those are the 6 easy steps to move your event to an online platform. If you have any questions or would like to talk through the process at all, please feel free to reach out to our Client Services team here at Ticketebo; we’re here to help!